Studio monitor are specialized loudspeakers used in audio production settings such as recording studios, filmmaking, television studios, radio studios, and project or home studios. Their primary purpose is to provide an accurate, uncolored representation of the sound being produced. This accuracy is essential for mixing and mastering audio, as it ensures that the final product will sound good on a wide variety of playback systems, from high-end audio equipment to standard consumer-grade speakers.
Unlike consumer speakers, which often enhance certain frequencies to make the sound more appealing or “color” the audio, studio monitors aim for a flat frequency response. This means they strive to reproduce audio signals as faithfully as possible, without adding or subtracting anything from the original sound. This flat response allows sound engineers, musicians, and producers to hear every detail of the recording and make precise adjustments to ensure the audio sounds balanced and clear in various listening environments.
Studio monitors are precision speakers designed for professional audio production environments. Their primary role is to provide a clear and accurate reproduction of the audio, essential for mixing and mastering tasks. Unlike consumer speakers that may enhance certain frequencies for a pleasing sound, studio monitors aim for a flat frequency response to ensure what you hear is a true representation of the audio.
In the realm of studio monitors, you have several types:
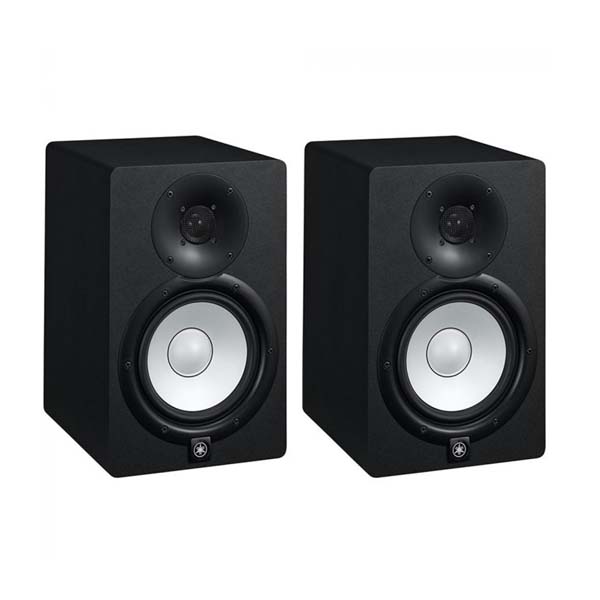
Active Monitors: These have built-in amplifiers, which simplifies setup and use. A classic example is the Yamaha HS8, known for its clarity and flat response, making it a favorite in home and professional studios alike.
Passive Monitors: These require an external amplifier. They offer more flexibility but need a more complex setup. The Avantone MixCubes are a popular choice, often used as secondary reference monitors in professional studios due to their ability to reveal flaws in a mix.
Near-Field Monitors: Ideal for small spaces where the listener is close to the speakers. The KRK Rokit 5 G4 is a great example, offering a balanced sound in a compact form, perfect for bedroom studios.
Far-Field Monitors: These are designed for larger spaces and provide a broader sound dispersion. The Adam Audio A7X, for instance, is well-regarded for its detailed sound and wide sweet spot, suitable for larger studio environments.
How to choose studio monitors based on your room Size:
When choosing studio monitors, room size and acoustics play a pivotal role:
- Small Rooms: In compact spaces like bedroom studios, 5-inch speakers like the KRK Rokit 5 G4 are typically sufficient. They provide enough clarity and bass response without overwhelming the room.
- Medium Rooms: In these spaces, 6 to 8-inch speakers are more appropriate. The Yamaha HS8, with its 8-inch woofer, delivers a more extended low-end, which is beneficial in slightly larger rooms.
- Large Rooms: Here, you might consider far-field monitors or even larger near-field monitors with 8-inch or more extensive woofers. The Adam Audio A7X, with its 7-inch woofer, offers a crisp and clear sound suitable for spacious environments.
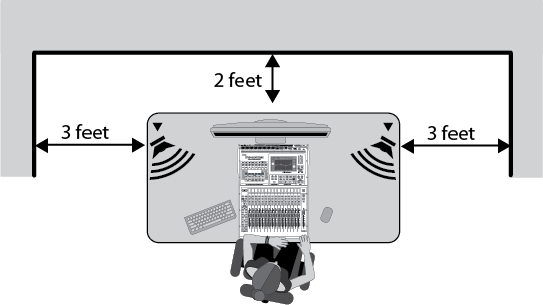
How to correctly place Studio Monitor:
The placement of monitors in relation to room size is also crucial:
- Distance Between Monitors: Ideally, monitors should be placed so they form an equilateral triangle with your listening position. This setup ensures an accurate stereo image and soundstage.
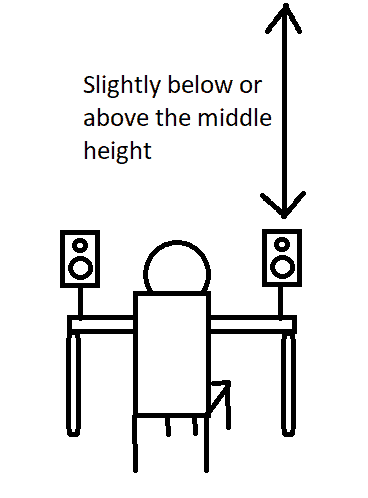
- Monitor Height: Monitors should be positioned at ear level for the most accurate sound perception. Stands or isolation pads can be used to achieve this.
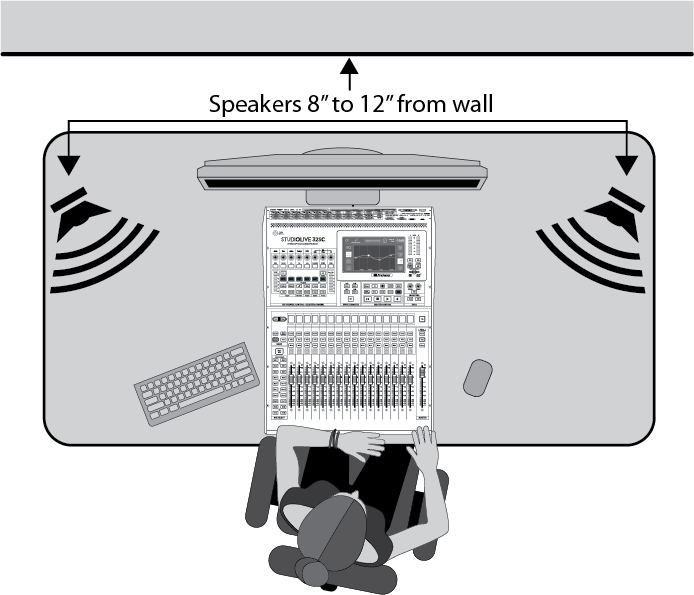
- Room Treatment: In untreated rooms, sound can bounce off walls, causing coloration and inaccuracies in what you hear. Using bass traps, acoustic panels, and diffusers can significantly improve the accuracy of your monitors.
A good placing example:
Maintaining your studio monitors involves regular cleaning, ensuring they are not exposed to extreme temperatures, and handling them carefully. It’s also worth considering additional accessories like monitor stands for optimal placement and isolation pads to reduce unwanted vibrations.
In conclusion, your choice of studio monitors should be guided by the size of your room, the type of audio work you do, and your budget. Whether you’re a beginner with a home studio or a professional in a commercial setting, there’s a studio monitor setup that’s right for you. Remember to consider the acoustic treatment of your room and the placement of your monitors for the best sound experience.
Also read:
How to Get Kids Engaged in Piano / Guitar Lessons